How to Wire a 7 Pin Trailer Plug? Understanding the 7 Pin Trailer Plug before wiring is crucial. This type of plug provides power to the trailer and supports vital functions like the braking system, tail lights, turn signals, and side lights. Proper wiring ensures the safety and functionality of your trailer while driving. Preventing potential traffic accidents or electrical failures caused by wiring errors.
How to Wire a 7 Pin Trailer Plug? In this guide, we will walk you through step by step how to safely and accurately wire a 7 pin trailer plug. Whether you’re attempting it for the first time or need to recheck existing connections. Make sure to follow each step diligently, without overlooking any details. To ensure that the wiring of your trailer plug is both safe and efficient.
Have you ever faced situations where your trailer lights suddenly stopped working or the braking system responded sluggishly? These common issues often stem from wiring errors or damage to the 7 pin trailer plug. It is a crucial component of hitching up your trailer to your truck.
The 7 pin trailer plug bears the responsibility of ensuring stable power and signal transmission. Mastering the art of proper wiring helps avoid potential dangers on the road. And ensures that your trailer operates smoothly under any circumstances.
Introduction: Mastering the wiring skills of a 7-pin trailer plug ensures safe journeys and equipment integrity
- Welcome you! An in-depth guide tailored for car owners and mechanics aiming to verify the optimal performance of trailer electronic systems. The 7 pin trailer plug, is a critical component connecting your vehicle and trailer.
- It not only needs to handle a significant amount of power but also must ensure accurate signal transmission. Involving key functions, such as trailer lights, braking systems, and reverse indicators.
In this article
- We will delve into the functionality of each wire and guide you through each step of the wiring process. The article provides you with clear, systematic guidance. We will analyze the function of each pin, and provide detailed instructions on how to wire a 7 pin trailer plug. And share professional tips to prevent common wiring errors and malfunctions.
- Wiring mistakes can lead to serious safety issues, such as sudden brake failures or light malfunctions. This is particularly dangerous on highways. Therefore, correct wiring is not only a technical matter but also a safety responsibility.
- By following this guide, you’ll be able to ensure that every journey is safe and enhance your technical skills. Enabling you to confidently handle the electrical needs of your trailer.
Tools and Materials: How to Wire a 7 Pin Trailer Plug?
Tools and materials:
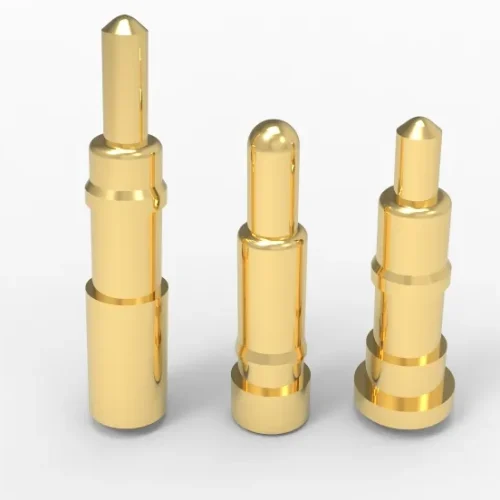
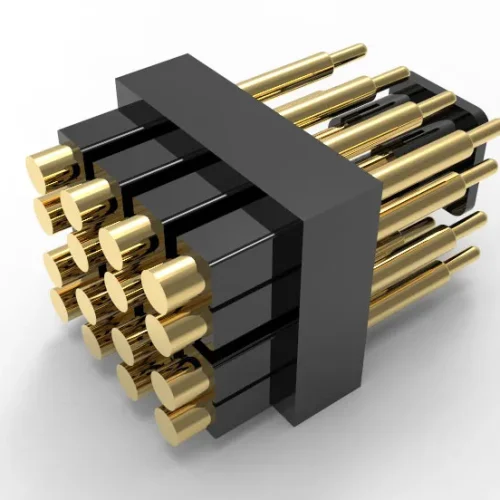
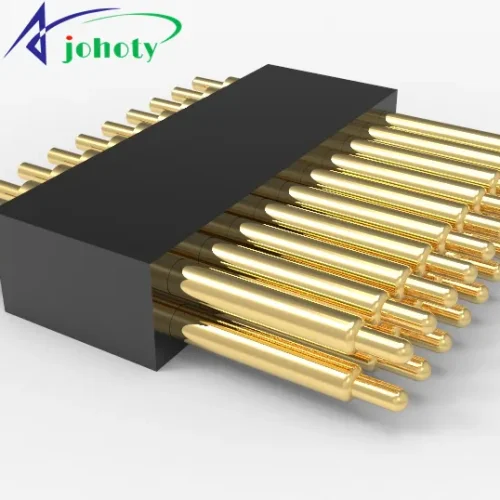
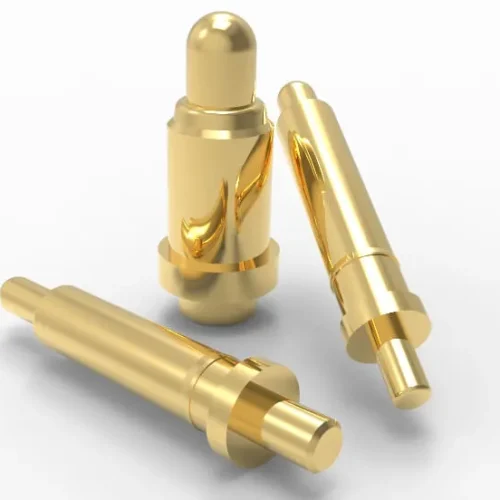
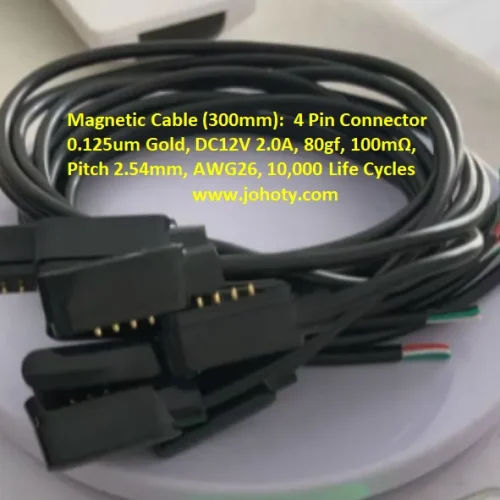
- 7 pin trailer plug: Choose a quality-approved plug from Johoty to ensure it meets the specifications of your trailer and towing vehicle.
- Wire stripping pliers: Used for accurately stripping the wire insulation to facilitate proper connections.
- Screwdriver set: Includes Phillips and flathead screwdrivers for installing and securing wires.
- Wire cutter/crimper: Used for cutting and crimping wires to ensure secure connections.
- Electrical tape: Used for insulation to ensure electrical safety after wiring.
- Heat shrink tubing: Used for wrapping and protecting connection points, providing additional insulation protection.
- Tester: Used to verify correct wiring and ensure all functions operate properly.
- Wire connectors: Used for reliable wire connections, ensuring long-term durability and stability.
- Cleaner and cloth: Used for cleaning the work area to ensure no dust or contaminants affect electrical connections.
Recommended Brands:
- 7 pin trailer plug: It’s recommended to choose reputable brands, such as Johoty, known for their high quality. Johoty ships directly from the factory, ensuring high quality and a competitive pricing advantage.
- Tools: You can use your existing tools or purchase tool kits from various brands that are convenient to procure.
- Tester: Fluke or Klein Tools circuit testers are highly rated in the industry and are recommended for use.
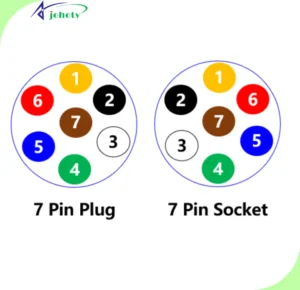
Pinout Explanation: How to Wire a 7 Pin Trailer Plug?
First Pin of Yellow: Left Signal, Brake Lighting
- Manages the left signal and brake lighting on the trailer. This ensures when the trailer makes a left turn or brakes, the corresponding signal is visible to other road users. It ensures safe driving.
Second Pin of Blue: Electric Brake Controller
- Transmits signals to the electronic brake controller installed on the trailer. This pin is crucial, especially for heavy trailers equipped with electronic brake systems.
Third Pin of White: Ground
- Serves as the ground wire for the system, ensuring circuit integrity and safety. Grounding is a fundamental safety requirement in any electrical system, preventing electrical faults and potential shocks.
Fourth Pin of Green: Right Turn Signal, Brake Light
- Regulates the right signal and brake lighting on the trailer. Similar to the first pin, but dedicated to the right-side signal. It ensures clear signals when making right turns or braking.
Fifth Pin of Black: 12V Positive Power
- Provides the main power supply, typically used for electrical devices within the trailer. This pin supplies continuous power to support internal lighting, refrigerators, and other equipment within the trailer.
Sixth Pin of Red: Auxiliary, Accessory Power
- Can be used to power additional trailer accessories, such as extra interior lighting or specific electrical devices. This provides additional flexibility, allowing the trailer to be configured with more electrical functions as needed.
Seventh Pin of Brown: Tail Lights, Clearance Lights
- Controls the trailer’s tail lights and clearance lights, which are particularly important during nighttime or low-light conditions. This ensures the visibility of the trailer under all conditions, especially in poor driving conditions.
Wiring Steps: How to Wire a 7 Pin Trailer Plug?
First Step: Strip the Wires
- Carefully use wire strippers to remove about 1cm of outer insulation from each wire to be connected.
Second Step: Connect Wires to Plug
- Match the respective colored wire ends to the corresponding holes in the plug based on each pin’s function.
- Secure each wire at the connection point inside the plug using a screwdriver. Ensure the screws are tight to prevent the wires from coming loose.
Third Step: Check and Test Connections
- After connecting each wire, use a wire tester to individually check if there’s current passing through each connection point to ensure proper wiring.
- Verify all circuit functions are working correctly, including turn signals, brake lights, tail lights, and the 12V power supply.
Fourth Step: Secure and Protect
- Wrap all exposed wires and connection points with insulating tape. Its function is to thwart wear and separation resulting from environmental influences or vibration.
- Ensure the 7 Pin Trailer Plug is securely mounted on the trailer. This prevents it from coming loose or detaching while driving.
Completion Inspection: How to Wire a 7 Pin Trailer Plug?
Visual Inspection:
- Double-check to see if all wires are correctly plugged into their assigned pins.
- Ensure there are no loose connections at the wire joints.
- Inspect the secure mounting of the 7 Pin Trailer Plug on the trailer, ensuring it doesn’t move.
- Verify the insulation of all wires is intact and check for any exposed wires or potential short-circuit risks.
Manual Testing:
- Gently tug on each wire to ensure they’re securely fixed in the plug without any looseness.
- Check the screw fixing points to ensure they’re tightened and the wire ends are properly secured.
Electrical Function Testing:
- Conduct continuity tests to ensure good electrical connections between each pin and its corresponding wire.
- Perform voltage tests to confirm pin 7 of the power wire has the correct 12V voltage output.
- Test signals by activating turn signals, brake lights, etc. On the towing vehicle check if the corresponding lights on the trailer respond correctly.
Field Function Testing:
- Connect the trailer to the towing vehicle and activate various lights and electronic devices. This entails examining brake lights, turn signals, tail lights, and other components, to make sure they’re performing as expected.
- Observe the electrical response of the trailer during towing. It is to ensure the stable operation of all electrical devices while in motion.
Final Inspection:
- After confirming all tests, double-check the overall securement of the 7 pin trailer plug and wire layout. To ensure no issues arise due to vibration or pulling during driving.
- Provide additional protection using insulating tape on any potential wear points.
Cleanup and Organization:
- Tidy up the workspace to make sure there are no forgotten tools or materials.
- Properly store all testing tools and remaining materials.
Safety Precautions: How to Wire a 7 Pin Trailer Plug?
Disconnect Power:
- Before starting any wiring work, make sure to completely disconnect the power sources of both the trailer and the towing vehicle. To prevent electric shocks and accidental electrocution.
Use the Right Tools and Materials:
- Ensure you’re using tools specifically designed for electrical work, such as insulated wire strippers and screwdrivers.
- Use wires and a 7 Pin Trailer Plug that meet the specifications, and avoid using inferior or unsuitable alternatives.
Wear Proper PPE:
- Ensure you wear insulated gloves and safety goggles when handling electrical equipment to prevent accidental injuries.
Follow the Wiring Diagram Carefully:
- Before wiring, thoroughly read and understand the wiring diagram to ensure each wire is correctly connected to its corresponding pin.
- Incorrect wiring can not only damage equipment but also cause safety hazards.
Ensure All Connections Are Secure:
- After wiring, check that each connection point is secure to avoid circuit failures or fire risks due to poor contact.
- Use appropriate screws and connectors to secure the wires.
Inspect and Test:
- After completing, use a wire tester or multimeter to check if each connection point has the correct current and voltage.
- Check for any short circuits or grounding errors in the circuit.
Prevent Moisture and Corrosion:
- Ensure the interface of the 7 Pin Trailer Plug is dry and protect it with suitable waterproof tape. It is to prevent moisture intrusion and corrosion.
Regular Maintenance and Inspection:
- Regularly inspect the trailer’s electrical connections, especially before and after long trips. It is to ensure all wire connections remain safe and reliable.
- Promptly replace any damaged or worn-out components.
Common Issues and Troubleshooting: How to Wire a 7 Pin Trailer Plug?
Lights Not Working:
One or more external lights, such as turn signals, brake lights, or tail lights, are not functioning.
- Check if the corresponding bulbs are burnt out, and if necessary, replace them.
- Use a voltmeter to check if the corresponding pins have voltage output. If there’s no voltage, inspect for cable breakage or looseness.
- Ensure the wiring of the 7 Pin Trailer Plug is correct, and connected according to the right color codes and pin functions.
Unstable Connection:
The trailer lights flicker or intermittently cut out while driving.
- Conduct a detailed inspection of every connection point to ensure that the wires and plugs are securely fastened without loose.
- Clean the contact points of the 7 pin trailer plug and socket to remove any rust or dirt. Improving electrical contact.
- Check for worn or damaged wires and replace them if necessary.
Short Circuit Issue:
A short circuit in the circuit may cause a fuse to blow or trailer functions to stop working.
- Employ a multimeter or circuit tester to check for short circuits. Focus on checking if the ground wire (usually white) is properly grounded.
- Confirm there are no exposed wires or insulation damage between wires.
- Check inside the plug for foreign objects or moisture causing short circuits.
Incorrect Function Activation:
Activating one function, like the left turn signal, triggers another unrelated function, like tail lights.
- Carefully inspect the wiring diagram of the 7 Pin Trailer Plug. Verify that each wire is accurately linked to its designated pin to ensure proper connectivity.
- Check for any wire misconnections or cross-wiring causing function confusion.
- If using homemade or non-standard wire harnesses, ensure they comply with the electrical specifications of the trailer and towing vehicle.
Low Voltage:
The electrical system seems to lack sufficient power, resulting in dim lights or poor performance of other electronic devices.
- Confirm if the battery voltage of both the towing and trailer vehicle is at a normal level.
- Ensure the cable size is appropriate to carry the required current load.
- Check for excessively long or thin wires causing a voltage drop.
Conclusion: How to Wire a 7 Pin Trailer Plug?
Through this blog post, we’ve detailed how to wire a 7 Pin Trailer Plug correctly. A vital procedure to ensure the safety and operational efficiency of trailers and commercial vehicles during transport. Mastering these skills helps avoid common electrical issues, like short circuits, light failures, or unstable connections. Ensures smoother fleet operations, reducing unexpected downtime and maintenance costs.
For our customers, such as freight companies, fleet managers, or trailer rental service providers, ensuring connection correctness is paramount. Good electrical connections can enhance operational efficiency and strengthen customer trust and reliance on your service. Therefore, investing time and resources to train technicians to master these basic yet crucial wiring skills. This will directly reflect in your business success and customer satisfaction.
Key Steps to Ensure Safety and Efficiency
We encourage all trailer and commercial vehicle operators to regularly review and maintain their electrical connections. And tackle any concerns utilizing the troubleshooting procedures detailed in this document. Furthermore, it’s essential to keep abreast of enhancement strategies and the latest industry trends. It is for ensuring long-term safety and efficiency as technology advances and new standards are implemented.
Remember, having the right knowledge and tools is the best defense against trailer electrical problems. Through this guide, you can ensure every connection is safe and reliable. While also setting a standard for safety and professionalism in the industry.